Table of Contents
Key Takeaways
- Installing a water heater isn’t a simple swap — the unit must match your home’s water, gas, venting, drainage, and electrical setup.
- Picking the right type and size (tank vs. tankless) depends on household hot-water demand, fuel type, and available space.
- Professional installation guards against leaks, water damage, electric shock, gas leaks, and carbon-monoxide risk.
- Meeting manufacturer specs and local code is essential for safety, warranty, and passing inspection.
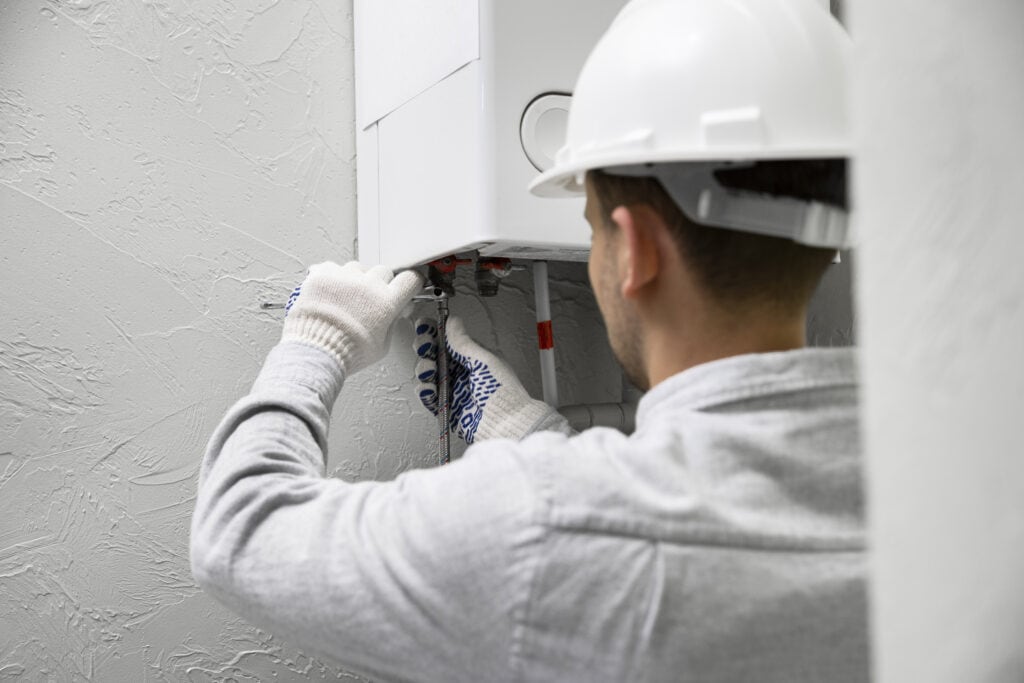
Water heater installation starts with choosing the right unit, checking the installation area, and confirming that the home’s water, gas, venting, drainage, and electrical systems can support it safely.
A careful installation process protects the home from leaks, water damage, electrical shock, gas leaks, and carbon monoxide risks.
For a first-time homeowner, the biggest mistake is treating heater installation as a simple appliance swap.
A new water heater must match household hot water demand, available fuel, space, existing connections, manufacturer requirements, and local codes.
A professional evaluation can help determine whether a tank-style water heater or a tankless water heater is the better fit.
Homeowners planning a new installation or water heater replacement can learn more about water heater installation options for both tank and tankless systems.
This step-by-step guide explains what a proper installation involves.
Some basic preparation steps can be useful for homeowners to understand, but work involving gas lines, venting, or unfamiliar electrical systems should be handled by a qualified professional.
Initial Assessment: Hot Water Demand and Location
The right water heater must meet peak household demand and physically fit the installation space with safe access, drainage, and ventilation.
Common types of water heaters include conventional storage tanks and tankless units.
Tank water heaters store hot water for immediate use, while tankless water heaters heat water on demand.
Household size matters, but the number of people in the home is not the only sizing factor.
The U.S. Department of Energy recommends sizing a storage water heater by comparing the unit’s first-hour rating with the household’s peak-hour demand.
The first-hour rating measures how many gallons of hot water the heater can provide in one hour, starting with a full tank of heated water.
To estimate demand, consider activities that may overlap during the busiest hour:
- Showers
- Dishwasher use
- Clothes washing
- Hand washing
- Food preparation and cleanup
A larger tank is not automatically the right water heater.
An oversized unit can increase purchase cost and unnecessary standby heat loss, while an undersized tank may run out of hot water during peak use.
The proposed location also needs a thorough inspection.
Check the available floor space, overhead clearance, nearby water lines, electrical access, gas supply, vent route, drain location, and room for future maintenance.
For a gas water heater installation, adequate ventilation and a correct venting system are critical.
Combustion equipment needs proper ventilation to operate safely, and incorrect venting can allow carbon monoxide to enter occupied areas.
The unit should also remain accessible.
A technician may eventually need to reach the drain valve, relief valve, electrical junction box, pilot light, burner assembly, gas fittings, or water connections without removing walls or fixed equipment.
Safety and Preparation Before Heater Installation
A safe installation begins by isolating water, electricity, and gas before the old unit is touched.
Before starting work, shut off the cold water supply valve feeding the water heater.
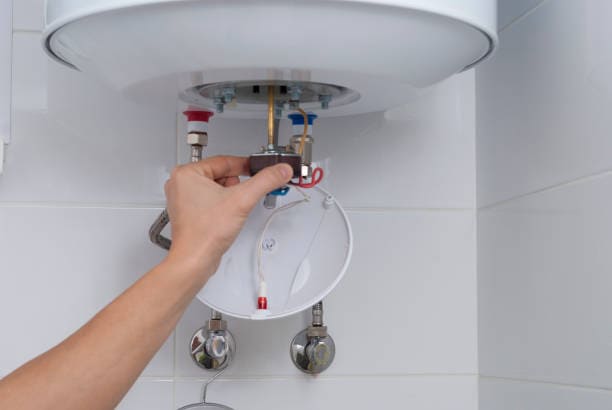
For an electric water heater installation, turn off electrical power at the circuit breaker and verify that power is actually off before opening the electrical junction box.
For a gas water heater, close the gas supply valve before disconnecting any gas connector or fitting.
Gas work should follow applicable building codes, local codes, manufacturer instructions, and permit requirements.
Incorrect wiring can cause electrical shock, electric shock injuries, equipment damage, or fire.
Gas installation errors can create leaks or combustion hazards.
Hiring a professional for work outside the homeowner’s training can prevent expensive future problems.
Prepare the work area before moving the old system.
Common equipment may include:
- Adjustable wrenches and pipe wrenches
- Tubing cutter
- Screwdrivers
- Voltage tester or multimeter
- Approved gas leak detector
- Hose for tank drainage
- Pipe and fitting materials approved for the application
- Safety glasses and work gloves
- Appliance dolly rated for the unit’s weight
Do not assume the old unit and new unit have identical connection locations.
Measure first.
A new heater may require changes to water pipes, venting, gas supply, electrical connections, or drainage.
Installation Process: Remove the Old Unit
The old water heater should be fully isolated, cooled when necessary, and drained before removal.
Start by attaching a hose to the drain valve and routing it to an appropriate drain location.
Be careful because water inside the tank may be hot enough to cause burns.
Open a hot water faucet to help relieve pressure and allow air into the system as the water drains.
Drain the existing tank completely before attempting to move it.
Even a partly filled tank can be extremely heavy.
Once the tank is empty, disconnect the water lines.
The exact method depends on the existing plumbing materials and fittings.
Some installations may use threaded connections, unions, soldered copper, flexible connectors, or other approved connection methods.
Next, disconnect the energy source.
An electric water heater requires safe disconnection of the power wires and ground wire after power has been verified as off.
A gas water heater requires the gas supply to be shut off and the gas connector disconnected by a person qualified to perform gas work.
Remove the old heater with suitable moving equipment.
An appliance dolly can reduce lifting risk and help protect floors and walls.
If the old water heater is being replaced because of age or recurring problems, homeowners may also find this guide on whether to repair or replace an older water heater useful.
Gas Water Heater Installation: Gas Lines and Gas Supply
Gas water heater installation requires correct gas sizing, sound fittings, and proper ventilation because a small installation error can create a serious safety hazard.
Before connecting a new heater, inspect accessible gas lines and gas fittings for corrosion, physical damage, or other signs of deterioration.
Existing piping must be suitable for the input requirements of the new unit.
The gas supply must be sized according to the equipment requirements and applicable code.
A higher-input new heater or tankless model may require a different gas supply arrangement than the old system.
New threaded connections require sealant approved for the specific fuel gas and connection type.
General-purpose plumbing sealants should not be assumed to be suitable for gas service.
After assembly, gas connections must be tested with an approved leak-detection method.
Never test a suspected gas leak with an open flame.
Venting also needs close attention.
The vent adapter, connector, clearances, slope, and termination must follow the heater manufacturer’s instructions and applicable codes.
Poor combustion or venting problems can create carbon monoxide risks.
The U.S. Consumer Product Safety Commission has documented water-heater-related carbon monoxide hazards associated with combustion control failures, which shows why gas safety should never be treated as a cosmetic installation detail.
Electric Water Heater Installation and Ground Wire Connections
Electric water heater installation requires a circuit that matches the unit’s electrical rating and connections made according to the manufacturer’s instructions and applicable electrical codes.
First, verify the required voltage and circuit breaker amperage for the new water heater.
Never assume that an existing circuit is suitable simply because the old heater used electricity.
The wiring compartment is commonly located in an electrical junction box on the unit.
With power confirmed off, the power wires must be connected using approved connectors suitable for the conductor type and size.
The home’s ground wire must be connected to the heater’s designated ground screw or grounding point.
Cable entry should use the required strain relief so that movement cannot pull on internal electrical connections.
Before energizing the circuit, the tank must be full of water.
Turning on electric heating elements in an empty tank can damage them.
Electrical updates may be necessary when the new heater has different requirements from the old unit.
If circuit sizing, conductor size, grounding, or breaker compatibility is uncertain, a qualified professional should inspect the electrical system.
Drain Pan and Discharge Pipe Installation
A correctly installed drain pan and relief-valve discharge pipe provide separate layers of protection against leaks and unsafe pressure conditions.
Place a properly sized drain pan beneath the tank where required by code or where leakage could damage the building.
The outline specification calls for a pan at least 2 inches wider than the heater, but the final size and drainage arrangement should also follow the heater instructions and applicable local code.
Route the drain pan outlet to an approved drainage location.
Proper drainage means a leak can leave the pan rather than simply filling it and spilling onto the surrounding floor.
The temperature and pressure relief valve, often called the T&P relief valve, is a critical safety device.
The U.S. Consumer Product Safety Commission’s water heater safety material states that an appropriately rated pressure and temperature relief valve should be installed at the manufacturer-specified port.
Install the discharge pipe using the required diameter and approved material.
The discharge pipe should follow manufacturer instructions and applicable code requirements for routing, support, termination, and drainage.
Never cap, plug, or block a relief valve discharge pipe.
A relief valve needs a safe path to discharge if excessive temperature or pressure develops inside the tank.
Connect Water Lines Using Compression Fittings
Water connections should be correctly sized, properly supported, and assembled without placing unnecessary strain on the heater fittings.
Measure the hot and cold water pipes before cutting or modifying anything.
Connection locations can vary between models, so measuring the new unit is safer than copying the old heater’s pipe lengths.
Where compression fittings are appropriate for the pipe material and local requirements, install them according to the fitting manufacturer’s instructions.
Place the fitting components in the correct order and tighten compression nuts to the manufacturer’s specification.
Overtightening can damage a fitting, while undertightening can cause leaks.
A fitting should not be treated as safer simply because more force was used.
The outline specifies a 3/4-inch NPT threaded adapter for water supply connections.
That size is common in many residential applications, but the actual connection must match the specific heater’s inlet and outlet specifications.
Flexible connectors may simplify future removal where they are approved for the installation.
They should be rated for the application, installed without sharp bends, and protected from strain.
After a water heater replacement, early attention to small leaks and maintenance can help prevent larger problems.
This guide to preventing problems after water heater replacement explains practical post-installation checks and care.
Install the New Water Heater and Complete Heater Installation
The new water heater should sit level, remain accessible, and connect to the home’s systems without forcing pipes, wires, or vent components into position.
Move the new unit into place carefully and set it in the drain pan.
Confirm that the heater is stable and that required clearances remain available around service points and combustion or ventilation areas.
For a gas water heater, secure the vent adapter and vent components according to the manufacturer’s instructions.
The vent system should not be improvised to fit a new heater that has different venting requirements from the old unit.
Attach the cold water supply and hot water outlet connections.
Support water pipes as needed so the heater’s connection points do not carry unnecessary pipe weight.
Install the included or manufacturer-specified temperature and pressure relief valve if it is not already factory-installed.
Then install the discharge pipe according to the required instructions and code provisions.
An expansion tank may be required in some closed plumbing systems.
Whether one is needed depends on system design, local requirements, and conditions such as pressure-control devices that prevent expanded heated water from flowing backward into the supply.
Pipe, Fill, and Commission Through a Hot Water Faucet
A tank-style water heater must be full and purged of air before electrical power or gas heat is activated.
Once the plumbing connections are complete, open the cold water supply slowly.
Filling at a controlled rate gives the installer time to observe connections and listen for unusual movement or leakage.
Open a hot water faucet in the home while the tank fills.
Air will leave the system through the faucet.
Expect sputtering at first.
Keep the faucet open until the water runs in a steady stream without bursts of air.
If the faucet aerator was removed to prevent debris from clogging it, reinstall the aerator after the water runs clear and steady.
For an electric water heater, do not turn on the circuit breaker until the tank is confirmed full.
For gas equipment, follow the manufacturer’s procedure for startup, pilot light operation if applicable, combustion checks, and venting verification.
Testing, Leak Checks, and Final Safety Steps
A water heater installation is not complete until every water, gas, drainage, venting, and electrical connection has been checked under operating conditions.
Inspect all water fittings for leaks.
Use a dry cloth or paper towel around threaded joints and compression fittings to detect small amounts of moisture that may be difficult to see.
For gas equipment, test every disturbed gas connection with an approved gas leak detector or another code-approved method.
Any detected leak must be corrected before the appliance operates.
Inspect the vent system while the heater is running.
Proper ventilation is essential for safe gas appliance operation.
Confirm that vent components remain secure and that the installation matches manufacturer instructions.
For electric equipment, energize the circuit only after confirming that the tank is full.
Check the electrical junction box cover, strain relief, ground wire, circuit breaker, and other electrical connections before applying power.
Confirm that the drain pan has a functional outlet path and that the relief valve discharge pipe is correctly routed.
The final inspection should also check for unstable pipe runs, unsupported connectors, water leaks, unusual sounds, and signs of improper operation.
Post-Installation Inspection and Maintenance
Good records and regular maintenance make it easier to identify changes before small issues become expensive repairs.
Record the model number, serial number, installation date, installer information, and warranty documents.
Keep these details in a location that can be found quickly if repair or replacement questions arise later.
Annual maintenance is a practical baseline for many water heater systems, though exact service needs depend on water quality, equipment type, manufacturer instructions, and usage.
Maintenance may include:
- Inspecting for leaks and corrosion
- Checking accessible water and gas connections
- Flushing sediment when appropriate for the unit
- Inspecting venting on combustion equipment
- Checking the T&P relief valve according to the manufacturer’s instructions
- Reviewing the drain pan and drainage path
- Checking operating temperature
- Servicing a tankless water heater according to the manufacturer’s schedule
Homeowners comparing efficiency options can also review the U.S. Department of Energy’s water heater sizing guidance.
The DOE explains that storage-unit sizing should consider peak-hour demand and first-hour rating rather than tank capacity alone.
Temperature settings deserve attention because excessively hot water raises scald risk.
The right setting can depend on household needs and equipment guidance, so homeowners should follow manufacturer instructions and consider vulnerable occupants when selecting a setting.
Troubleshooting and When to Call a Pro
No hot water usually points to a power, ignition, control, heating, or fuel-supply problem, but troubleshooting should stop before it reaches unsafe gas or electrical work.
For an electric water heater, start with simple observations.
Check whether the circuit breaker has tripped.
If it trips repeatedly, do not keep resetting it because repeated trips may indicate an electrical fault that needs diagnosis.
For a gas water heater, check whether the appliance is operating according to its normal startup sequence.
Older models may use a pilot light, while other units use electronic ignition.
Call a licensed plumber or other appropriately qualified professional for:
- Suspected gas leaks
- Gas supply changes
- Venting problems
- Signs of carbon monoxide or combustion trouble
- Repeated electrical faults
- Major water leaks
- Relief valve problems
- Significant corrosion
- Code or permit questions
- A heater installation that requires major plumbing modifications
DIY installation may appear to reduce labor costs, but errors can create future costs through leaks, water damage, failed equipment, code corrections, or unsafe operation.
Labor costs vary significantly because a straightforward like-for-like replacement is different from an installation requiring new gas lines, venting changes, electrical upgrades, drainage work, or relocation.
Permits and inspections may be required depending on the jurisdiction and scope of work.
Many local governments regulate water heater installation through building, plumbing, fuel-gas, or electrical codes.
Check with the local building department before work begins.
Water Heater Installation Questions First-Time Homeowners Ask
What Are the Two Most Common Types of Water Heaters?
The two most common broad categories are tank and tankless water heaters.
A storage-tank heater keeps a volume of heated water ready for use, while a tankless model heats water as demand occurs.
Other technologies include heat pumps and solar water heaters.
Heat pump systems move heat from surrounding air into the water, while solar systems use solar collectors as part of the water-heating system.
How Do I Choose the Right Water Heater Size?
Match the heater’s output to the household’s peak hot water demand.
For storage units, the U.S. Department of Energy recommends comparing peak-hour demand with the heater’s first-hour rating.
Household size affects demand, but usage patterns matter too.
A smaller household with several simultaneous morning showers and appliance loads may need more peak capacity than a larger household that spreads hot water use throughout the day.
Can Most Homeowners Install a Water Heater Themselves?
Some homeowners have advanced plumbing or electrical skills, but a complete installation can involve water supply work, gas, combustion venting, high-voltage electrical systems, drainage, permits, and inspections.
Professional installation is especially important where the job requires gas line work, venting changes, electrical modifications, or code interpretation.
A homeowner should not perform work that exceeds their training or is restricted by local requirements.
Why Is the Drain Pan Important?
A drain pan can collect water from small leaks and direct it toward an adequate drain.
It is especially important where leakage could damage finished floors, ceilings, walls, or stored property.
A pan is not a substitute for fixing a leak.
If water appears in the pan, identify the source promptly.
What Causes a New Water Heater to Have No Hot Water?
For electric equipment, possible causes include loss of power, a tripped circuit breaker, wiring problems, or heating element issues.
For gas equipment, possible causes include ignition, pilot light, gas supply, control, or combustion problems.
If basic checks do not identify a simple cause, stop troubleshooting before opening gas connections or working on live wiring.
How Can Homeowners Reduce Future Water Heater Problems?
Regular inspection, maintenance, leak checks, correct temperature management, and prompt attention to unusual noises or changes in performance can reduce the chance that a minor issue becomes a major repair.
Keep the area around the unit accessible, follow the manufacturer’s maintenance schedule, and record the model and serial number at installation.
A well-documented system is easier to service and evaluate later.

Ray White is the owner and operator of A Plus Priority Plumbing, bringing over 30 years of hands-on experience in the plumbing industry. He provides reliable residential and commercial plumbing services to homes and businesses throughout Greater Atlanta, Georgia, and surrounding areas, with a focus on emergency service and fair, affordable pricing.